Looking for Answers?
Browse our articles to find the answers you need
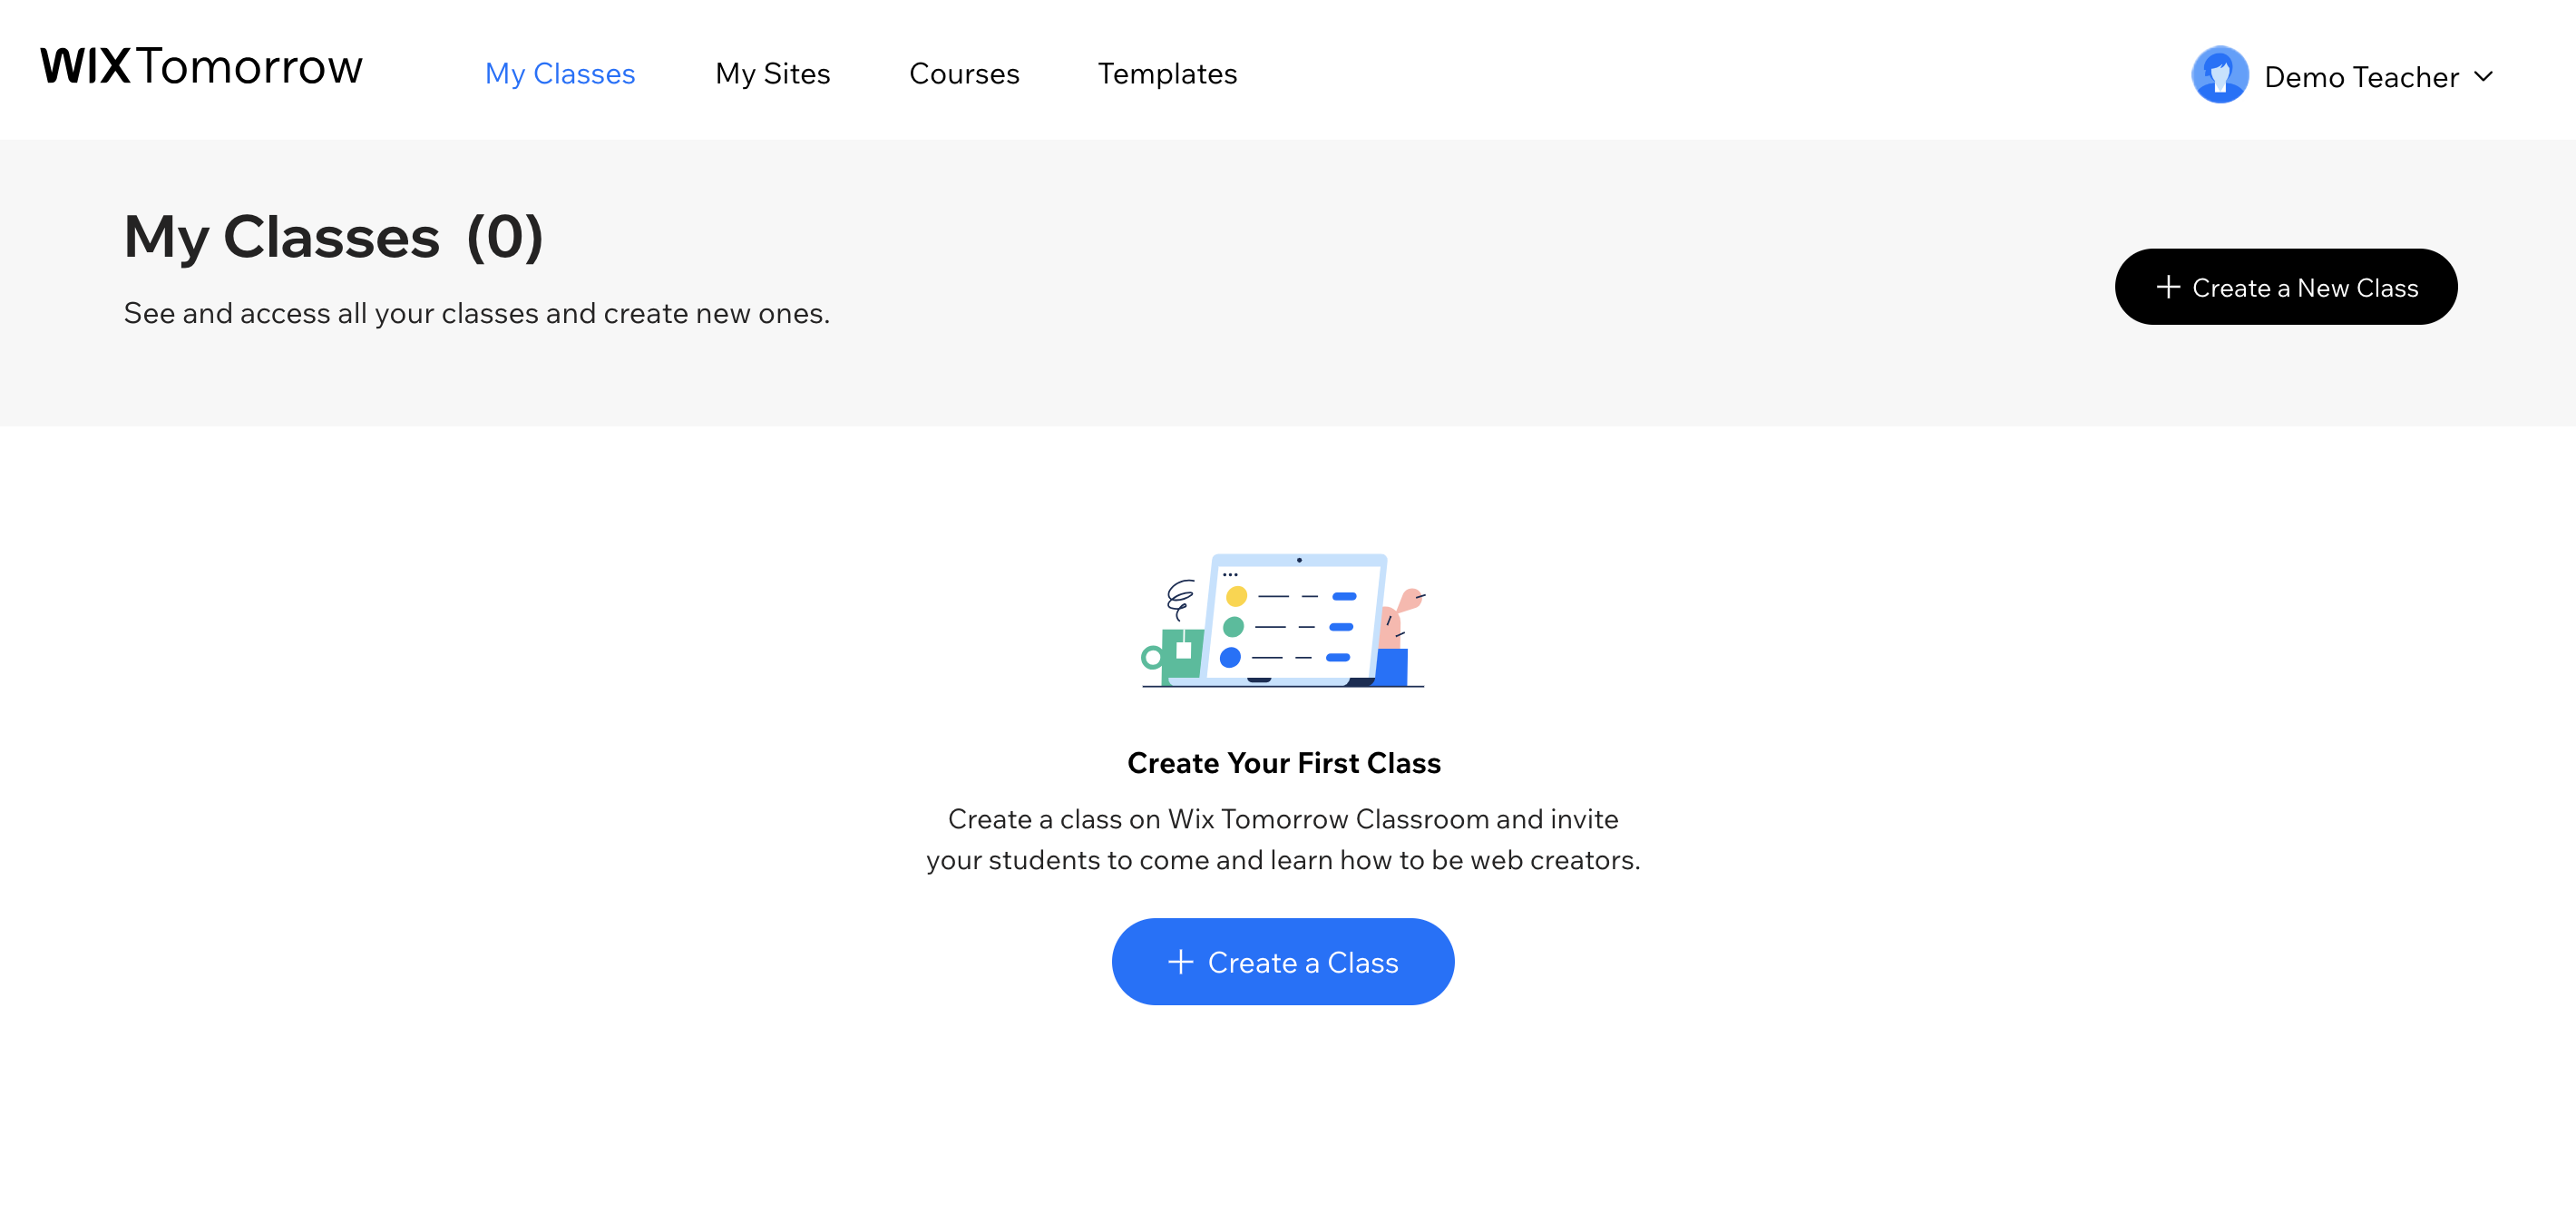
Creating a Class
Wix Tomorrow Classroom comes with a couple of ways to get set up and start teaching. First, you’ll need to create a class.
Create your first class
To create your first class, you’ll need to go to the Classes section of your dashboard.
STEP 1: Under My Classes, click on Create New Class.

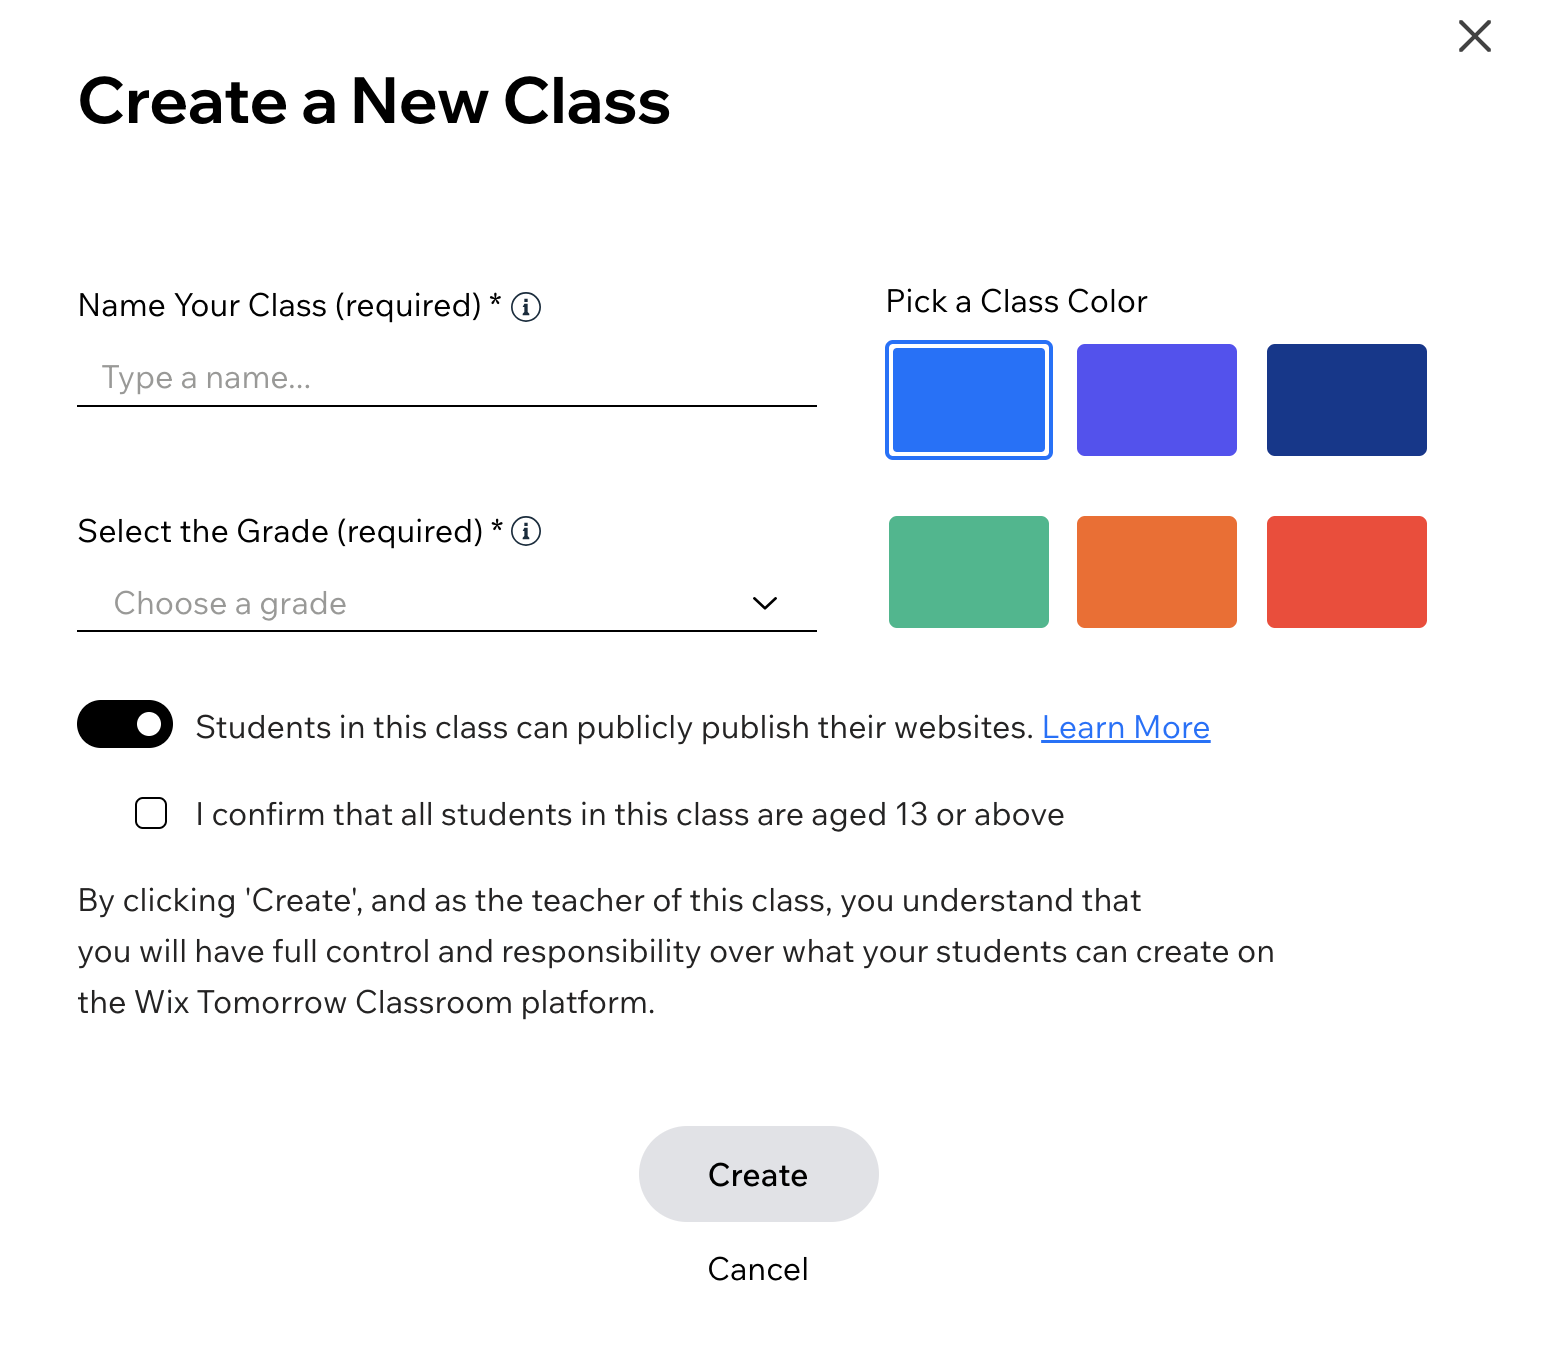
STEP 2: Now pick a class name, select the grade and choose a color for your class.

STEP 3: Do you want your students to have publish permissions? Use the toggle to choose your preference. Read more about publish options here.
STEP 4: Make sure to click on the checkbox, confirming that your students are all 13 or older.
STEP 5: Last, click on Create.
Creating additional classes
Your first class is added and you’re ready to invite students. Now, create a few more classes. Here’s how:
In the menu towards the top of your screen, select All Classes. This will take you back to the Classes section, where you can create more classes.
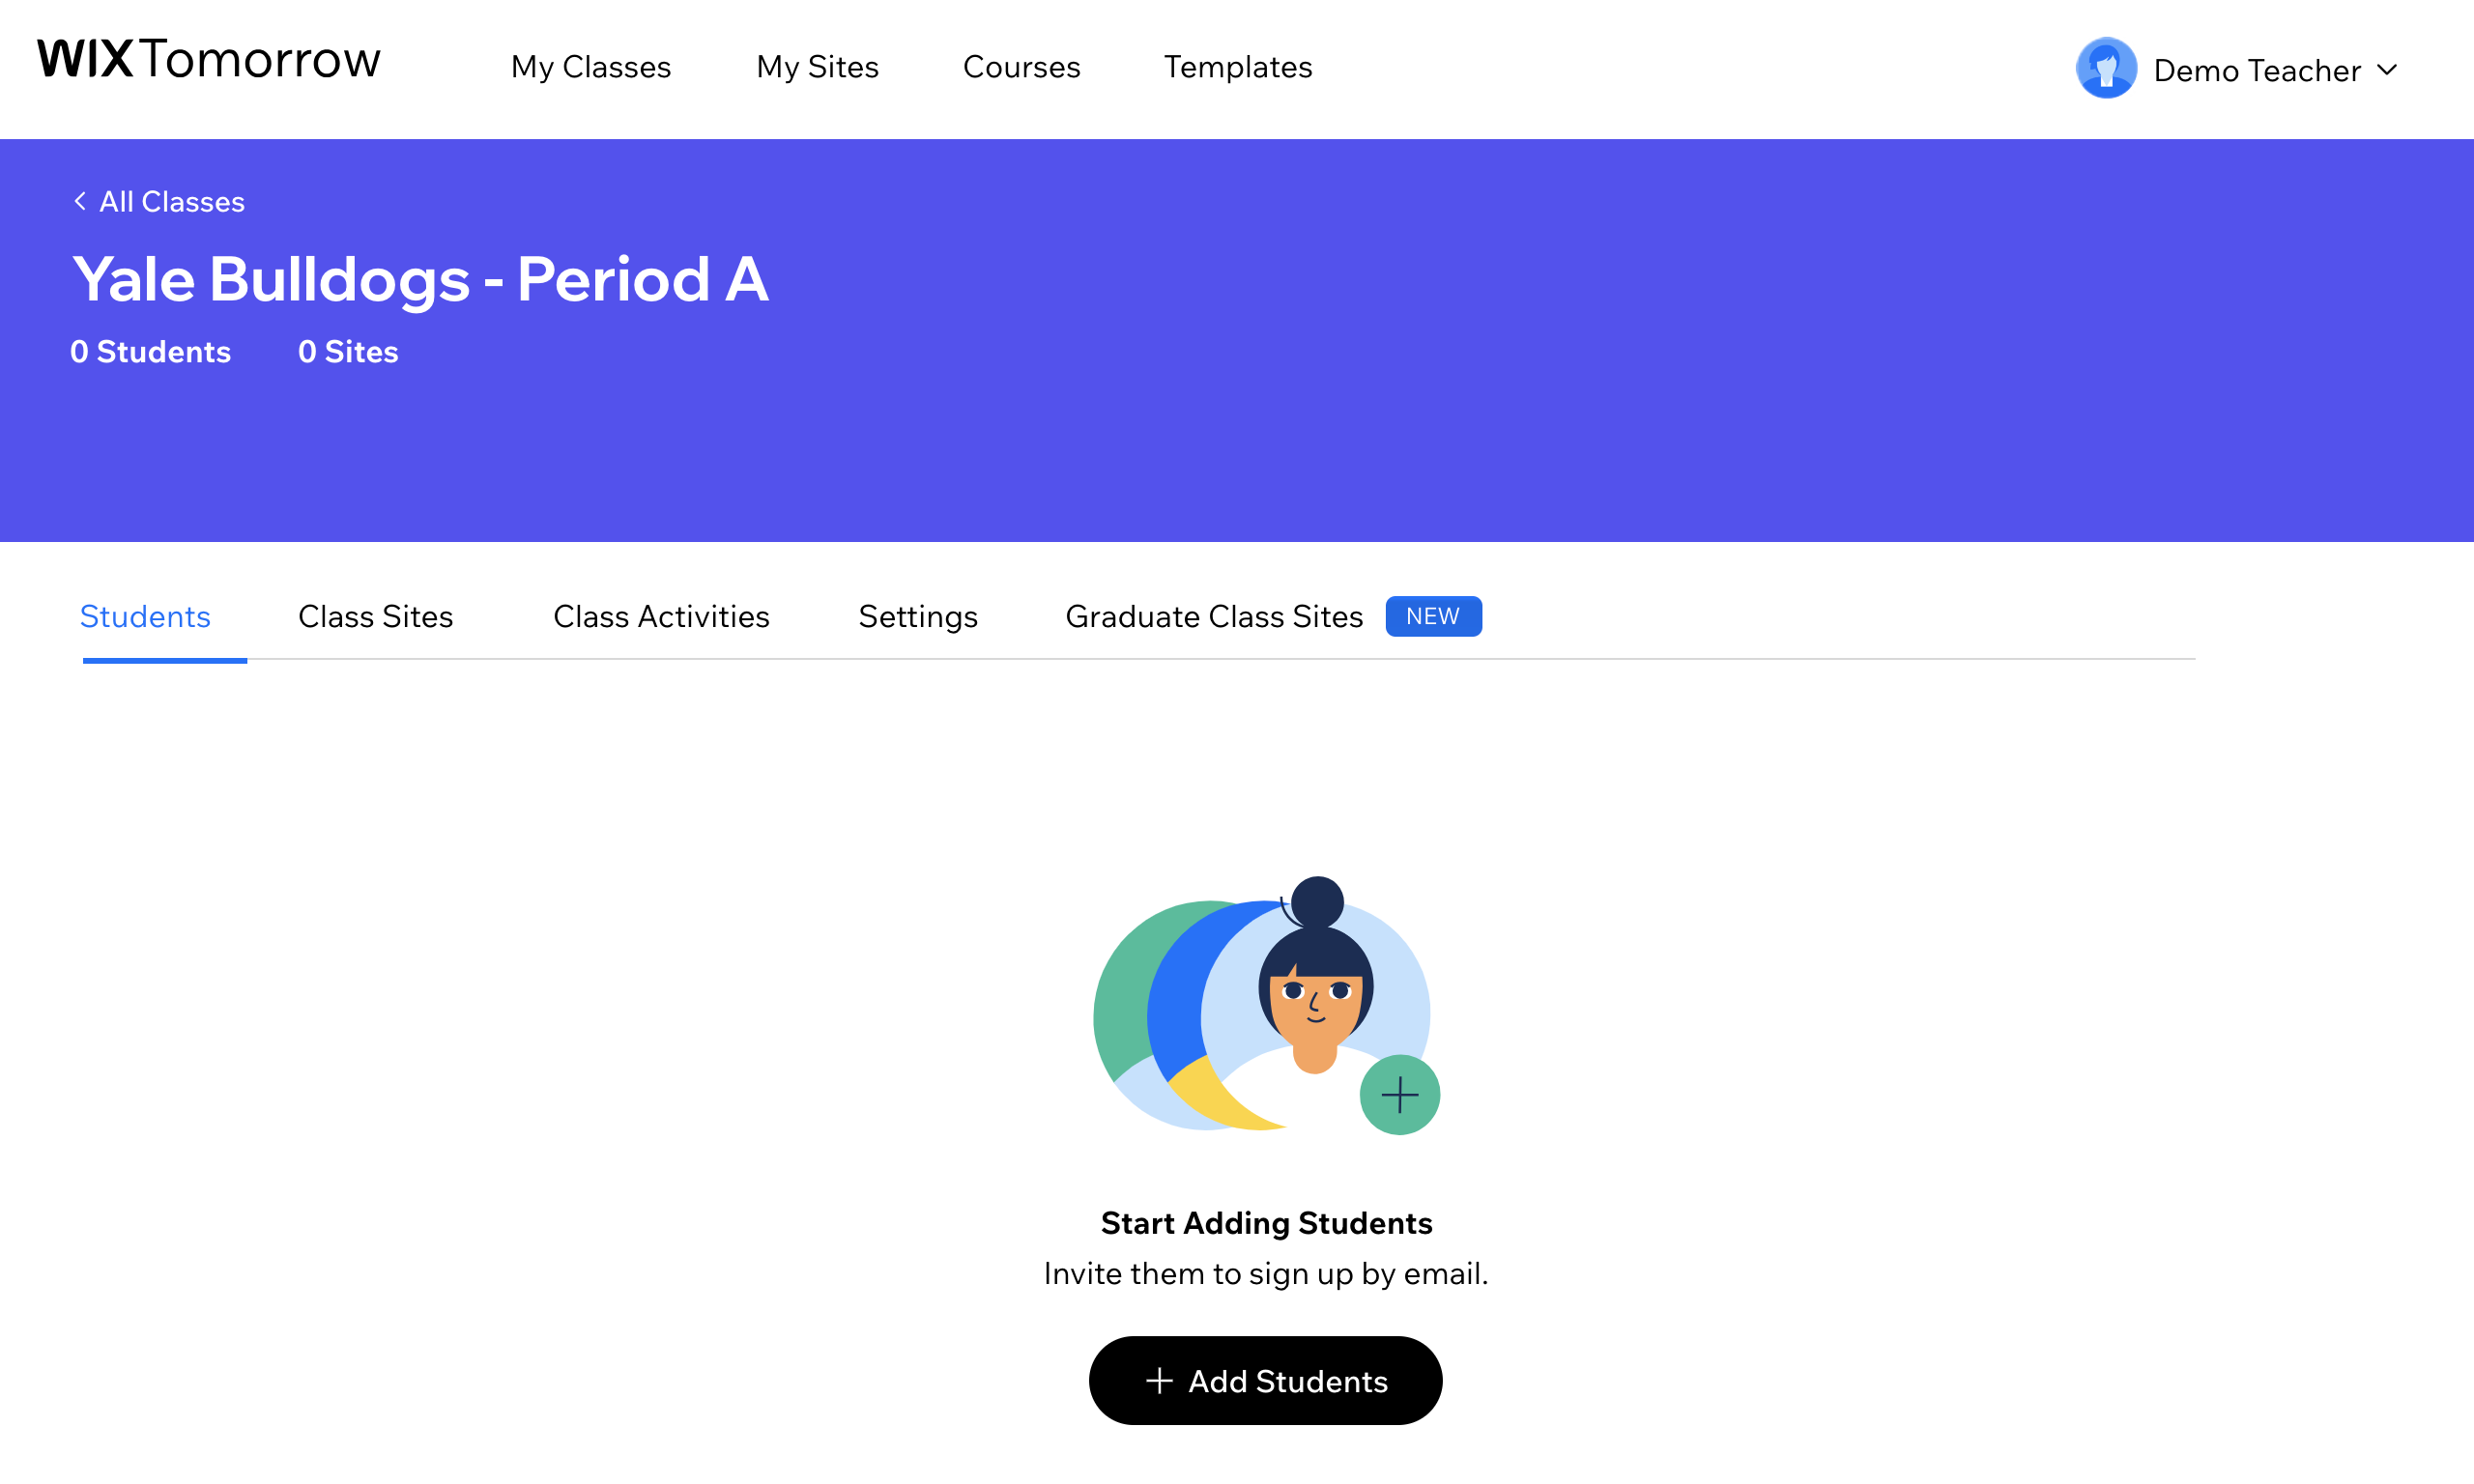
Adding students to a class
Start adding students to your classes by inviting them right from the dashboard.
- Click + Add Students.
- Add their emails, or import from Google Classroom or Microsoft Teams. You can paste numerous email addresses at once.
- Click Add Students.
Each student will get a personalized email inviting them to create an account. Or, they can go directly to wix.com/tomorrow/classroom/platform/student-login. From there, they can choose a password, or use Google login to create their account.
Read more about adding students to your class here.
Read more about adding students to your class here.

Note
Students will need to sign up with the exact email address you used to invite them.
Tip
Need assistance? Contact us on support-tomorrow@wix.com.
Was this article helpful?